




For a cost estimator, a project is never one drawing. It’s dozens of sheets: floor plans, levels, measurements scattered across tabs. The building in your head is one thing; on screen it’s a stack of PDFs. You switch, you cross-check, you keep a mental map of “what’s on level three relative to level one.”
We’ve added 3D View: floors come together in one space, measurements show up together, and from 3D you can jump straight to the right 2D drawing. Below — how it works, how to calibrate floors, and why the same release also ships Create skill with AI.
The problem
Classic takeoff lives in 2D. That’s right for accuracy: drawing, scale, polygon, count. But when there are many floors, 2D starts fighting how you actually think about the project.
A typical day:
- open the floor plan for level one;
- take measurements;
- move to level two;
- re-orient yourself;
- try to hold in your head how volumes and rooms stack by height.
Mistakes here aren’t “I can’t draft.” They come from context switching: attention slips, floors blur together, and the link between sheet and space exists only in your head.
What we needed wasn’t “pretty 3D for the sake of 3D.” It was a view where the project becomes a building again — without losing the connection to working 2D.
How it works now
There’s a mode switcher in the bottom bar:
- 2D View — familiar takeoff;
- 3D View — a spatial view of the project;
- 2D and 3D View — both at once.
The idea is simple: 2D stays where precision work happens; 3D is where you get orientation. You’re not abandoning takeoff. You’re adding a layer of understanding.
2D and 3D side by side
The usual fear: “3D is a separate toy — the real work is still in 2D.” That’s why dual view and focus linking aren’t decoration. They’re part of the workflow.
Open 2D and 3D View. On one side — the drawing. Next to it — space. Spot a measurement in 3D, click it — the UI takes you to the matching 2D sheet and helps you focus on the right place.
Find it in space — keep working on the drawing. One project — two views, without losing context.
So 3D doesn’t pull you out of the product. It shortens the path from “where is this on the drawing?”
Measurements from every drawing — in one view
Once floors are lined up, you get what people ask 3D for: see measurements together, not one sheet at a time.
Plans that used to live in different tabs sit in one space. Areas, outlines, markup — not a pile of screenshots in your head, but a picture of the project.
.png)
Not “sheet 12 of 47” — a building: floors, measurements, the whole project.
Expectations for this release: 3D is about overview, navigation, and laying out pages in space. You still do fine takeoff work in 2D — but in 3D you can select measurements, isolate them, and see the whole set at once. 3D answers “what does this look like as a whole — and where do I go back on the drawing?”
Floors, layers, and calibration
For the space not to become a pretty pile, you choose which pages live in the 3D scene and how they align.
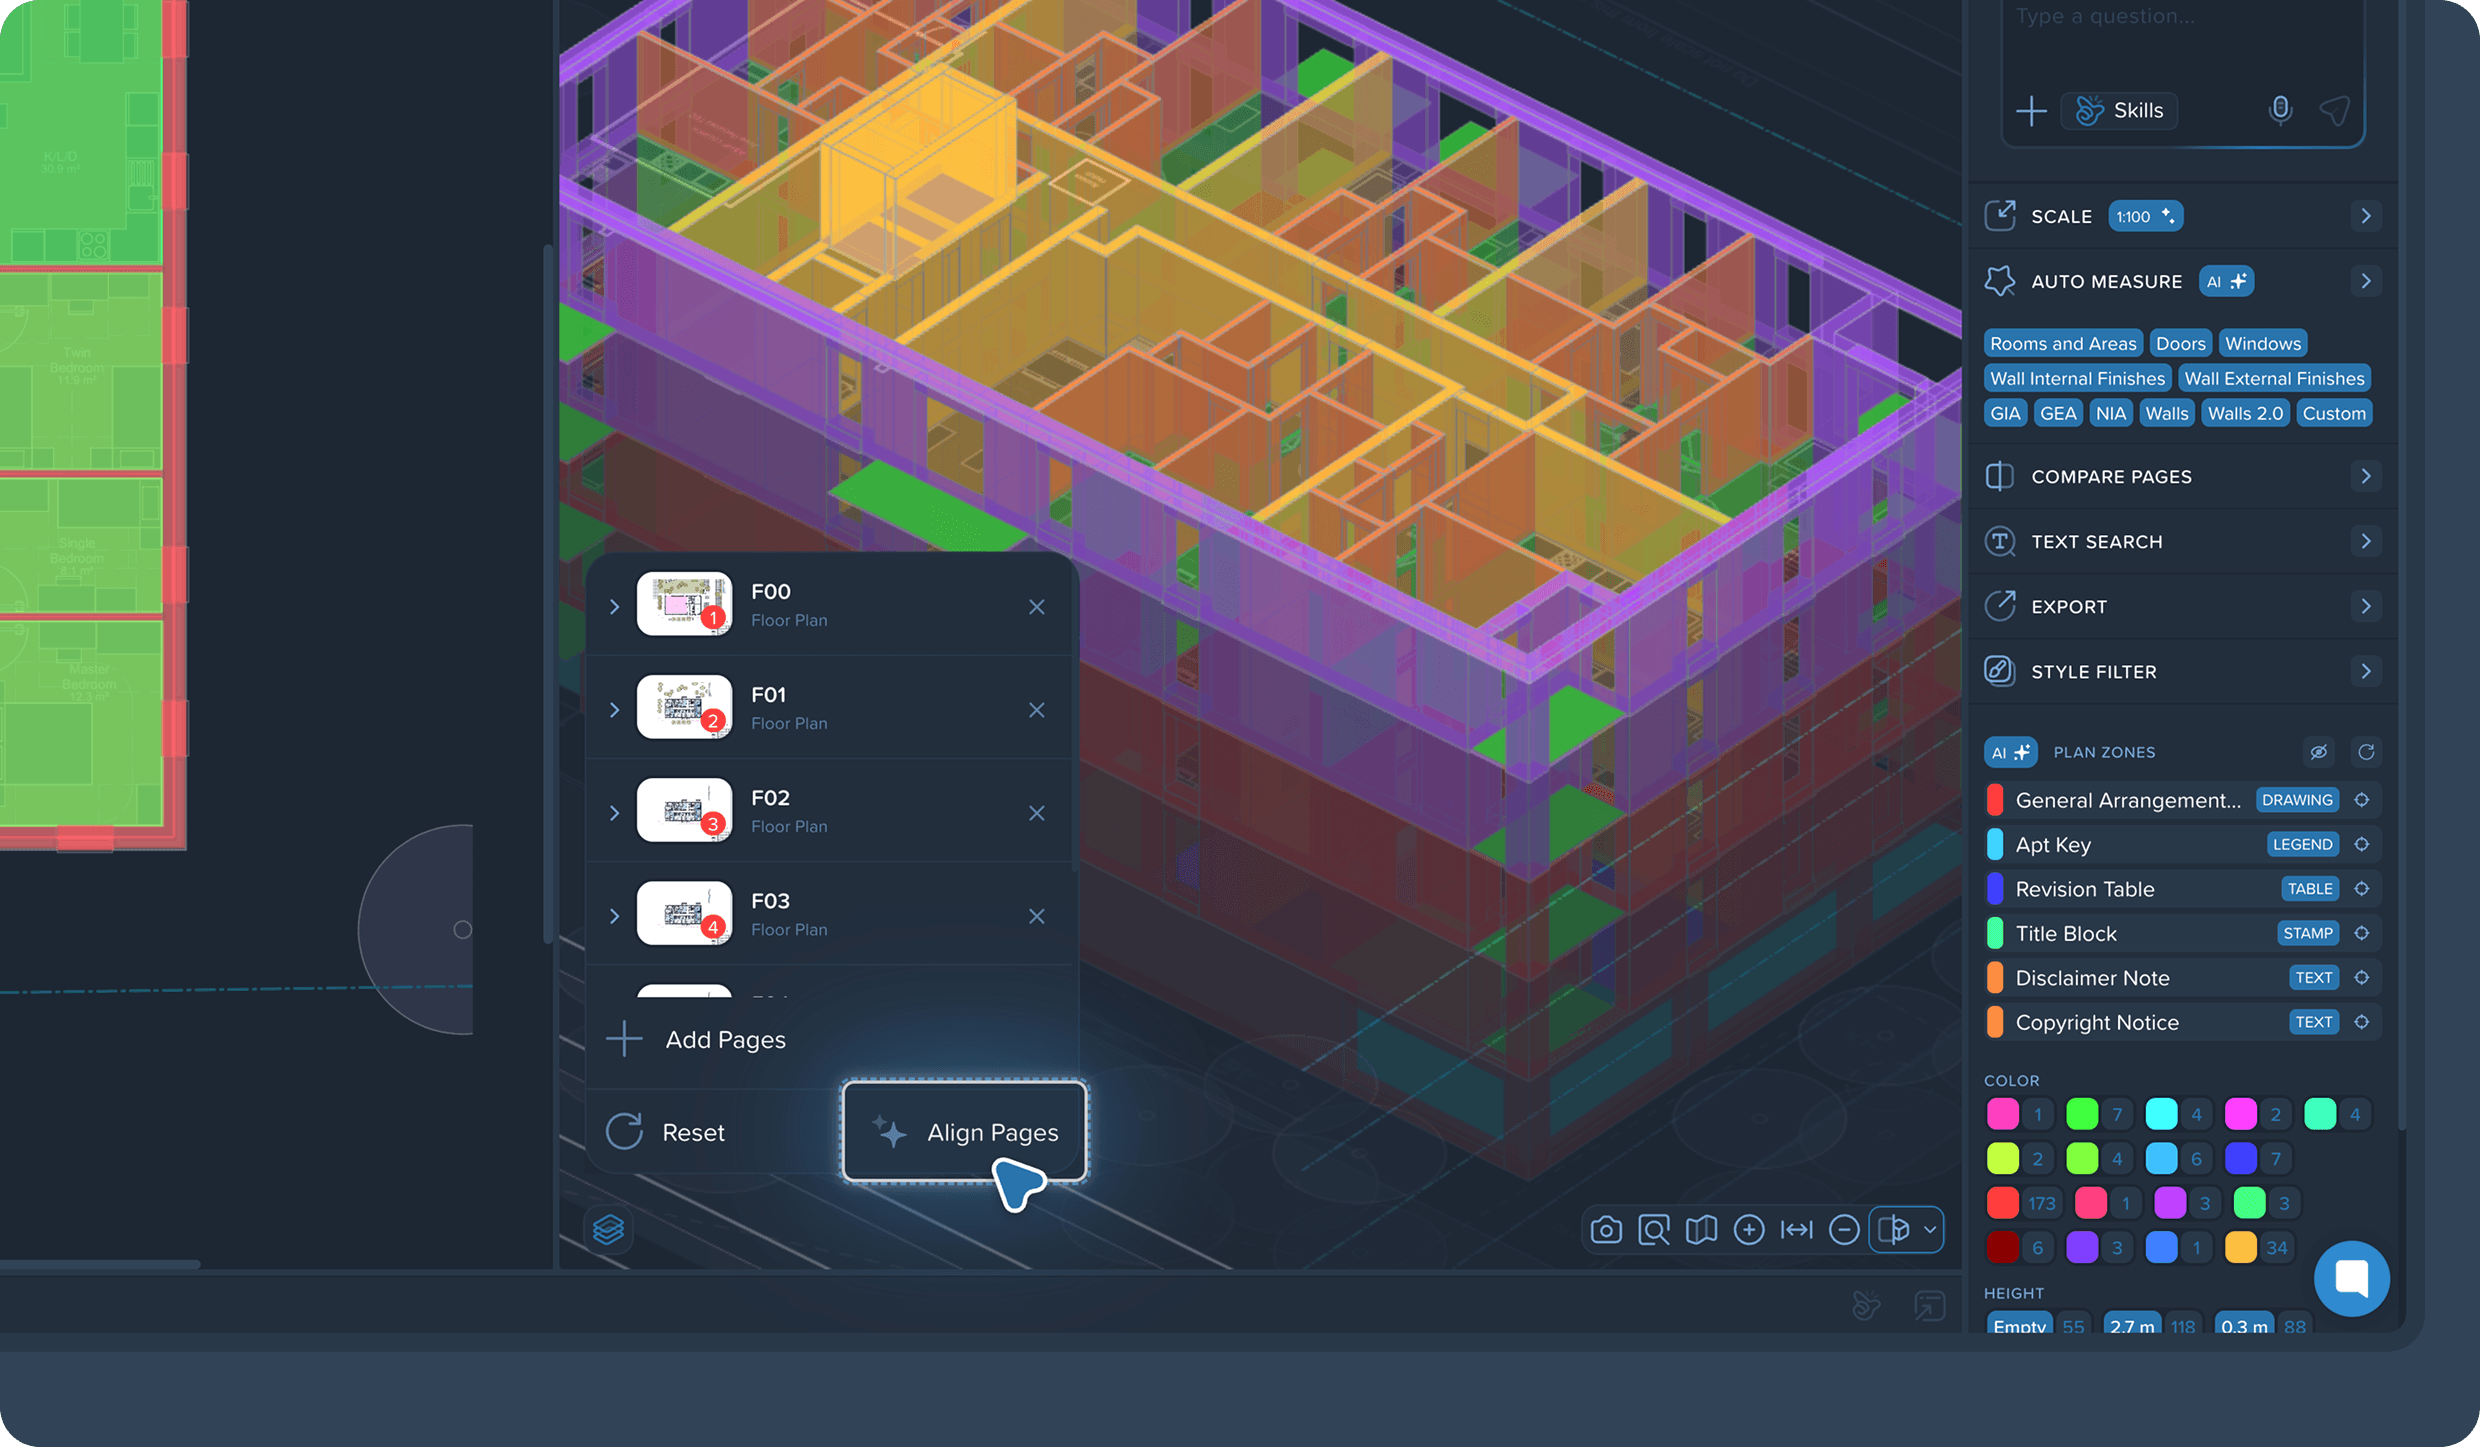
Open the Layers panel and use Add Pages to pull several drawings into one view — a whole file, or a selection. Remove a page with the ✕, or drag to reorder floors; the 3D scene updates with you.
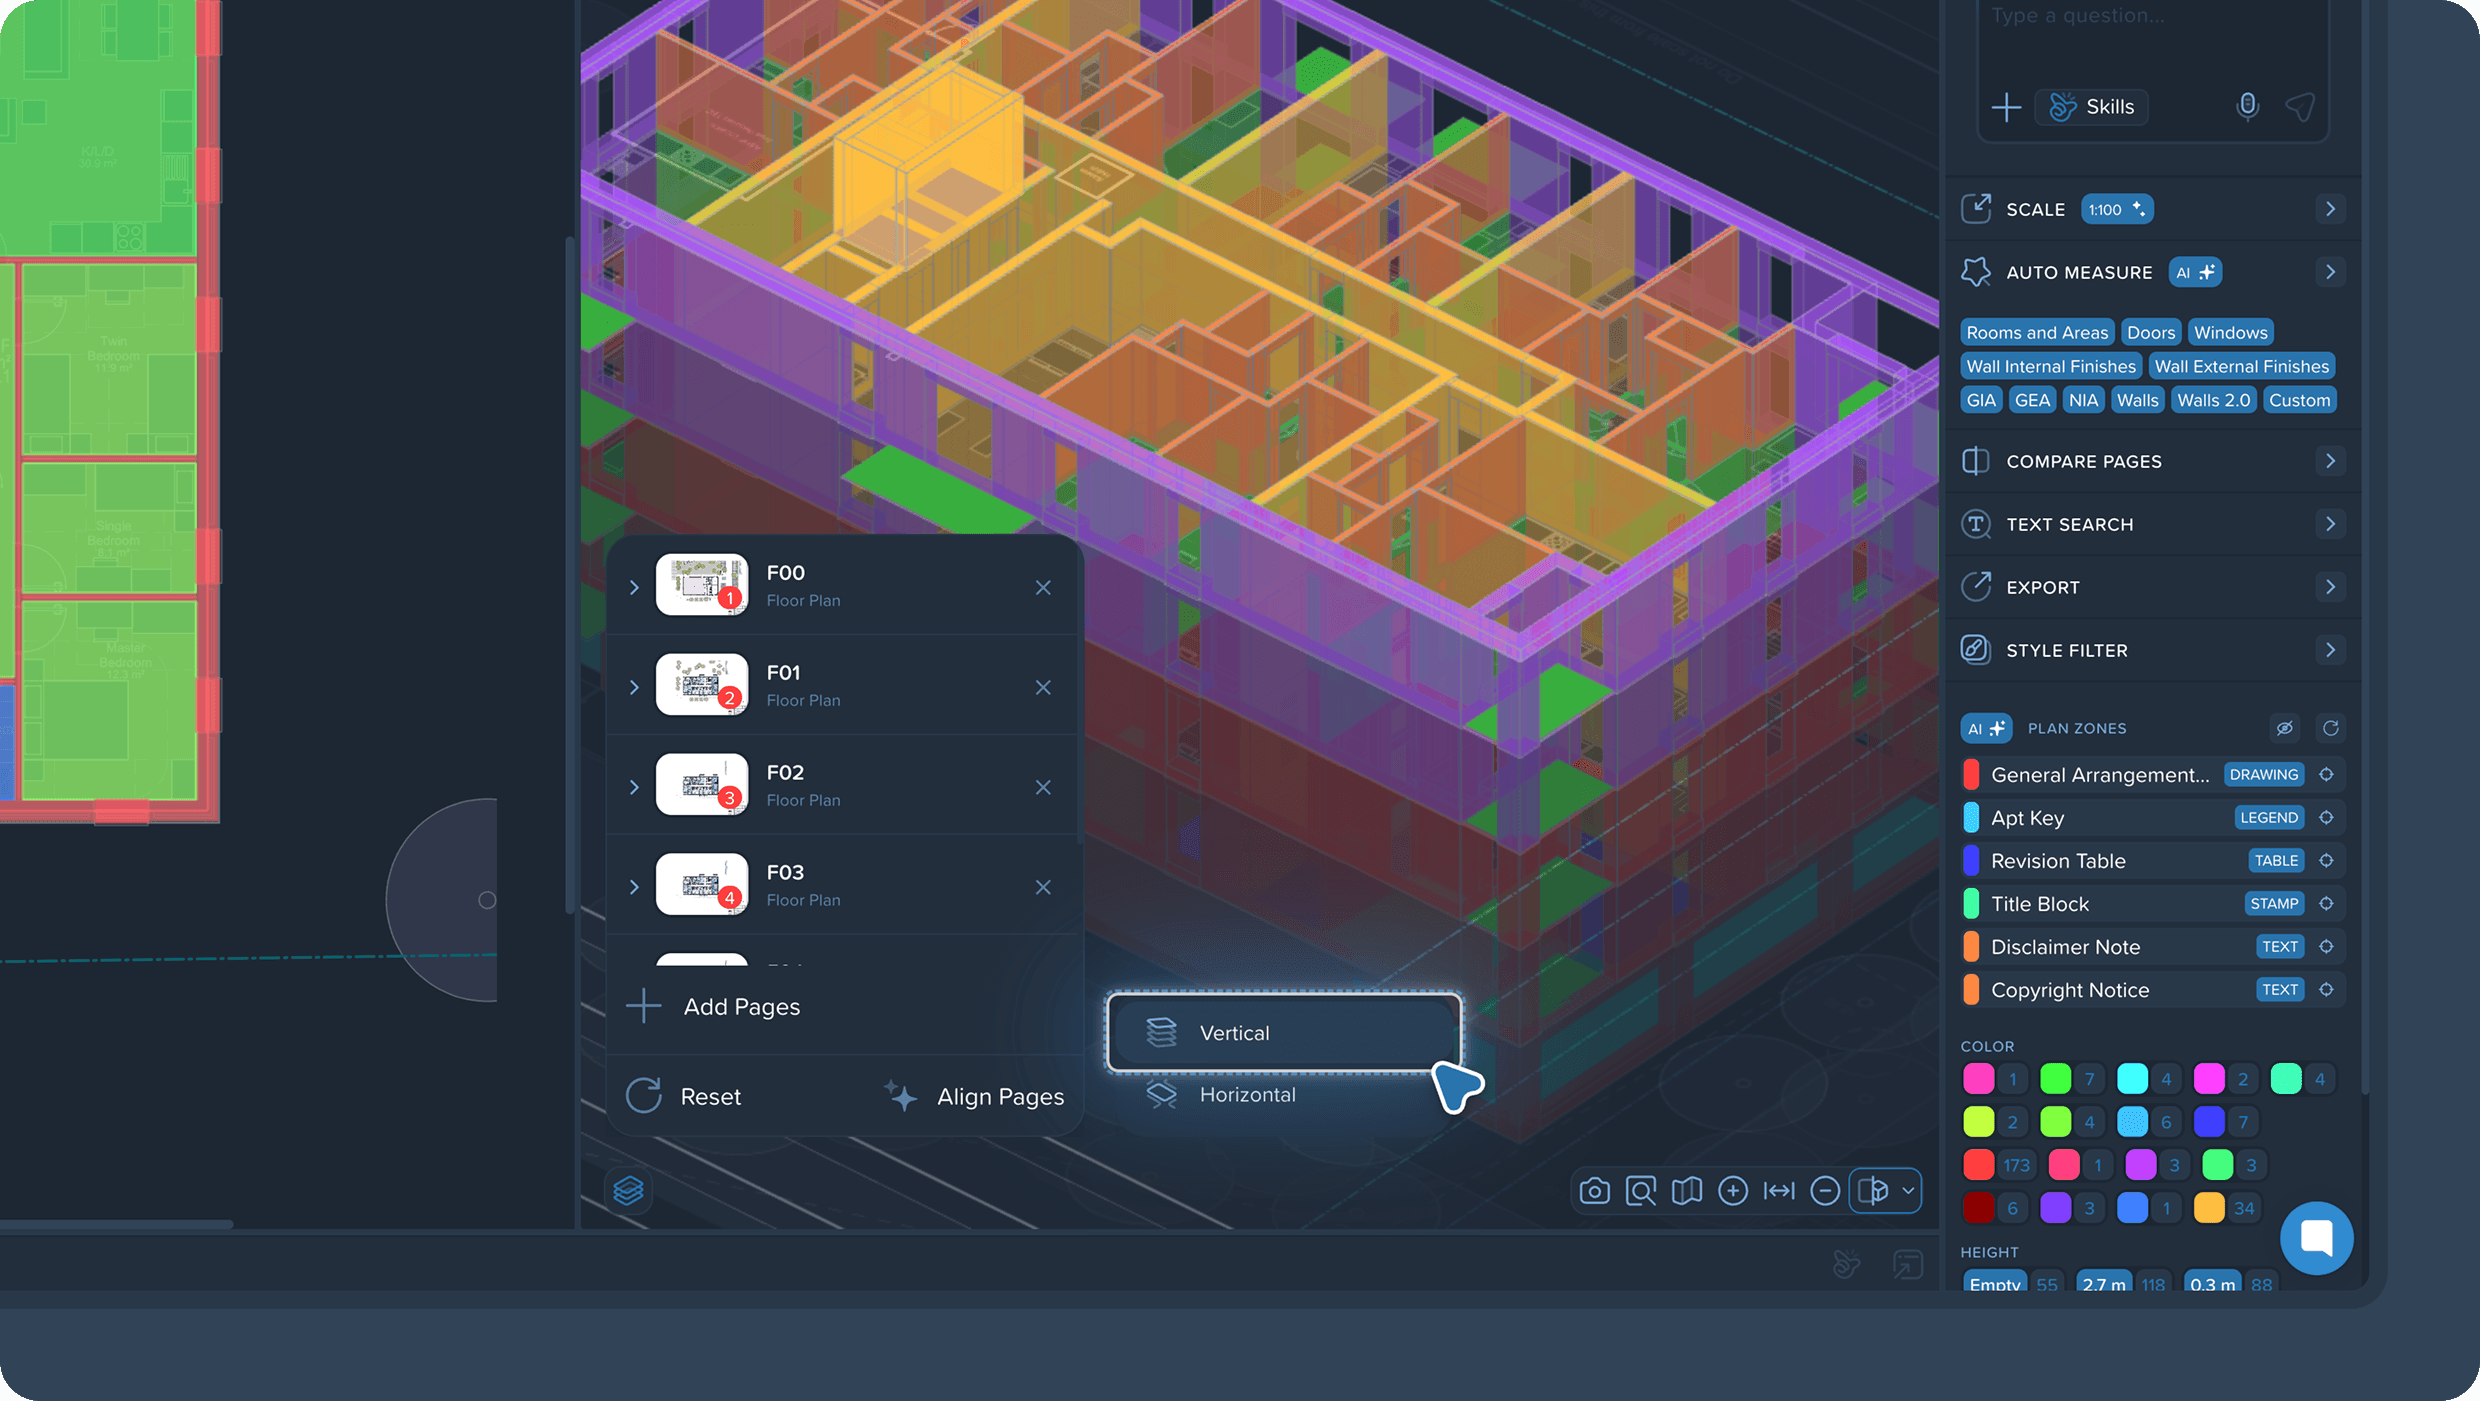
Align Pages controls the layout:
- Vertical — stack floors like a building; set a floor height (for example 4 m) and the levels above shift with it;
- Horizontal — lay drawings side by side on a flat grid when you want to compare sheets in one glance.
Per-page tweaks (height / offset and the rest) are there when a level still sits wrong. Reset returns the current page to its base placement.
Add the floors you need — then Align Pages Vertical for a building, or Horizontal to compare drawings side by side.
A practical order:
- Turn on 3D or 2D+3D.
- Add Pages for the floors you want in the scene.
- Set Align Pages to Vertical or Horizontal.
- Nudge height / offset where a floor still drifts — Reset if you need a clean slate.
- Click a measurement in 3D and continue on the matching 2D sheet.
Create skill with AI — the second act of this release
Alongside 3D, we closed another pain: skills are useful, but building steps by hand is still a barrier.
Now you can describe a process in plain language — and AI builds the skill: steps, a scaffold, what you used to assemble with clicks and wording by hand. You don’t have to learn the structure from scratch. You do have to check the result.
How it looks:
- Open create skill.
- Describe the process.
- AI proposes a scaffold.
- Review the steps, tighten the wording, add quality checks.
- Run it on a real project.
On-camera example:
“Find all floor plans, recognize rooms & areas, group them and name them by room.”
From one description — a working workflow scaffold, not an empty builder.
AI gives the draft; you keep the accuracy.
Shorter works too: “Sort drawings by type and open only floor plans” — a solid first skill if you want the flow without a long scenario.
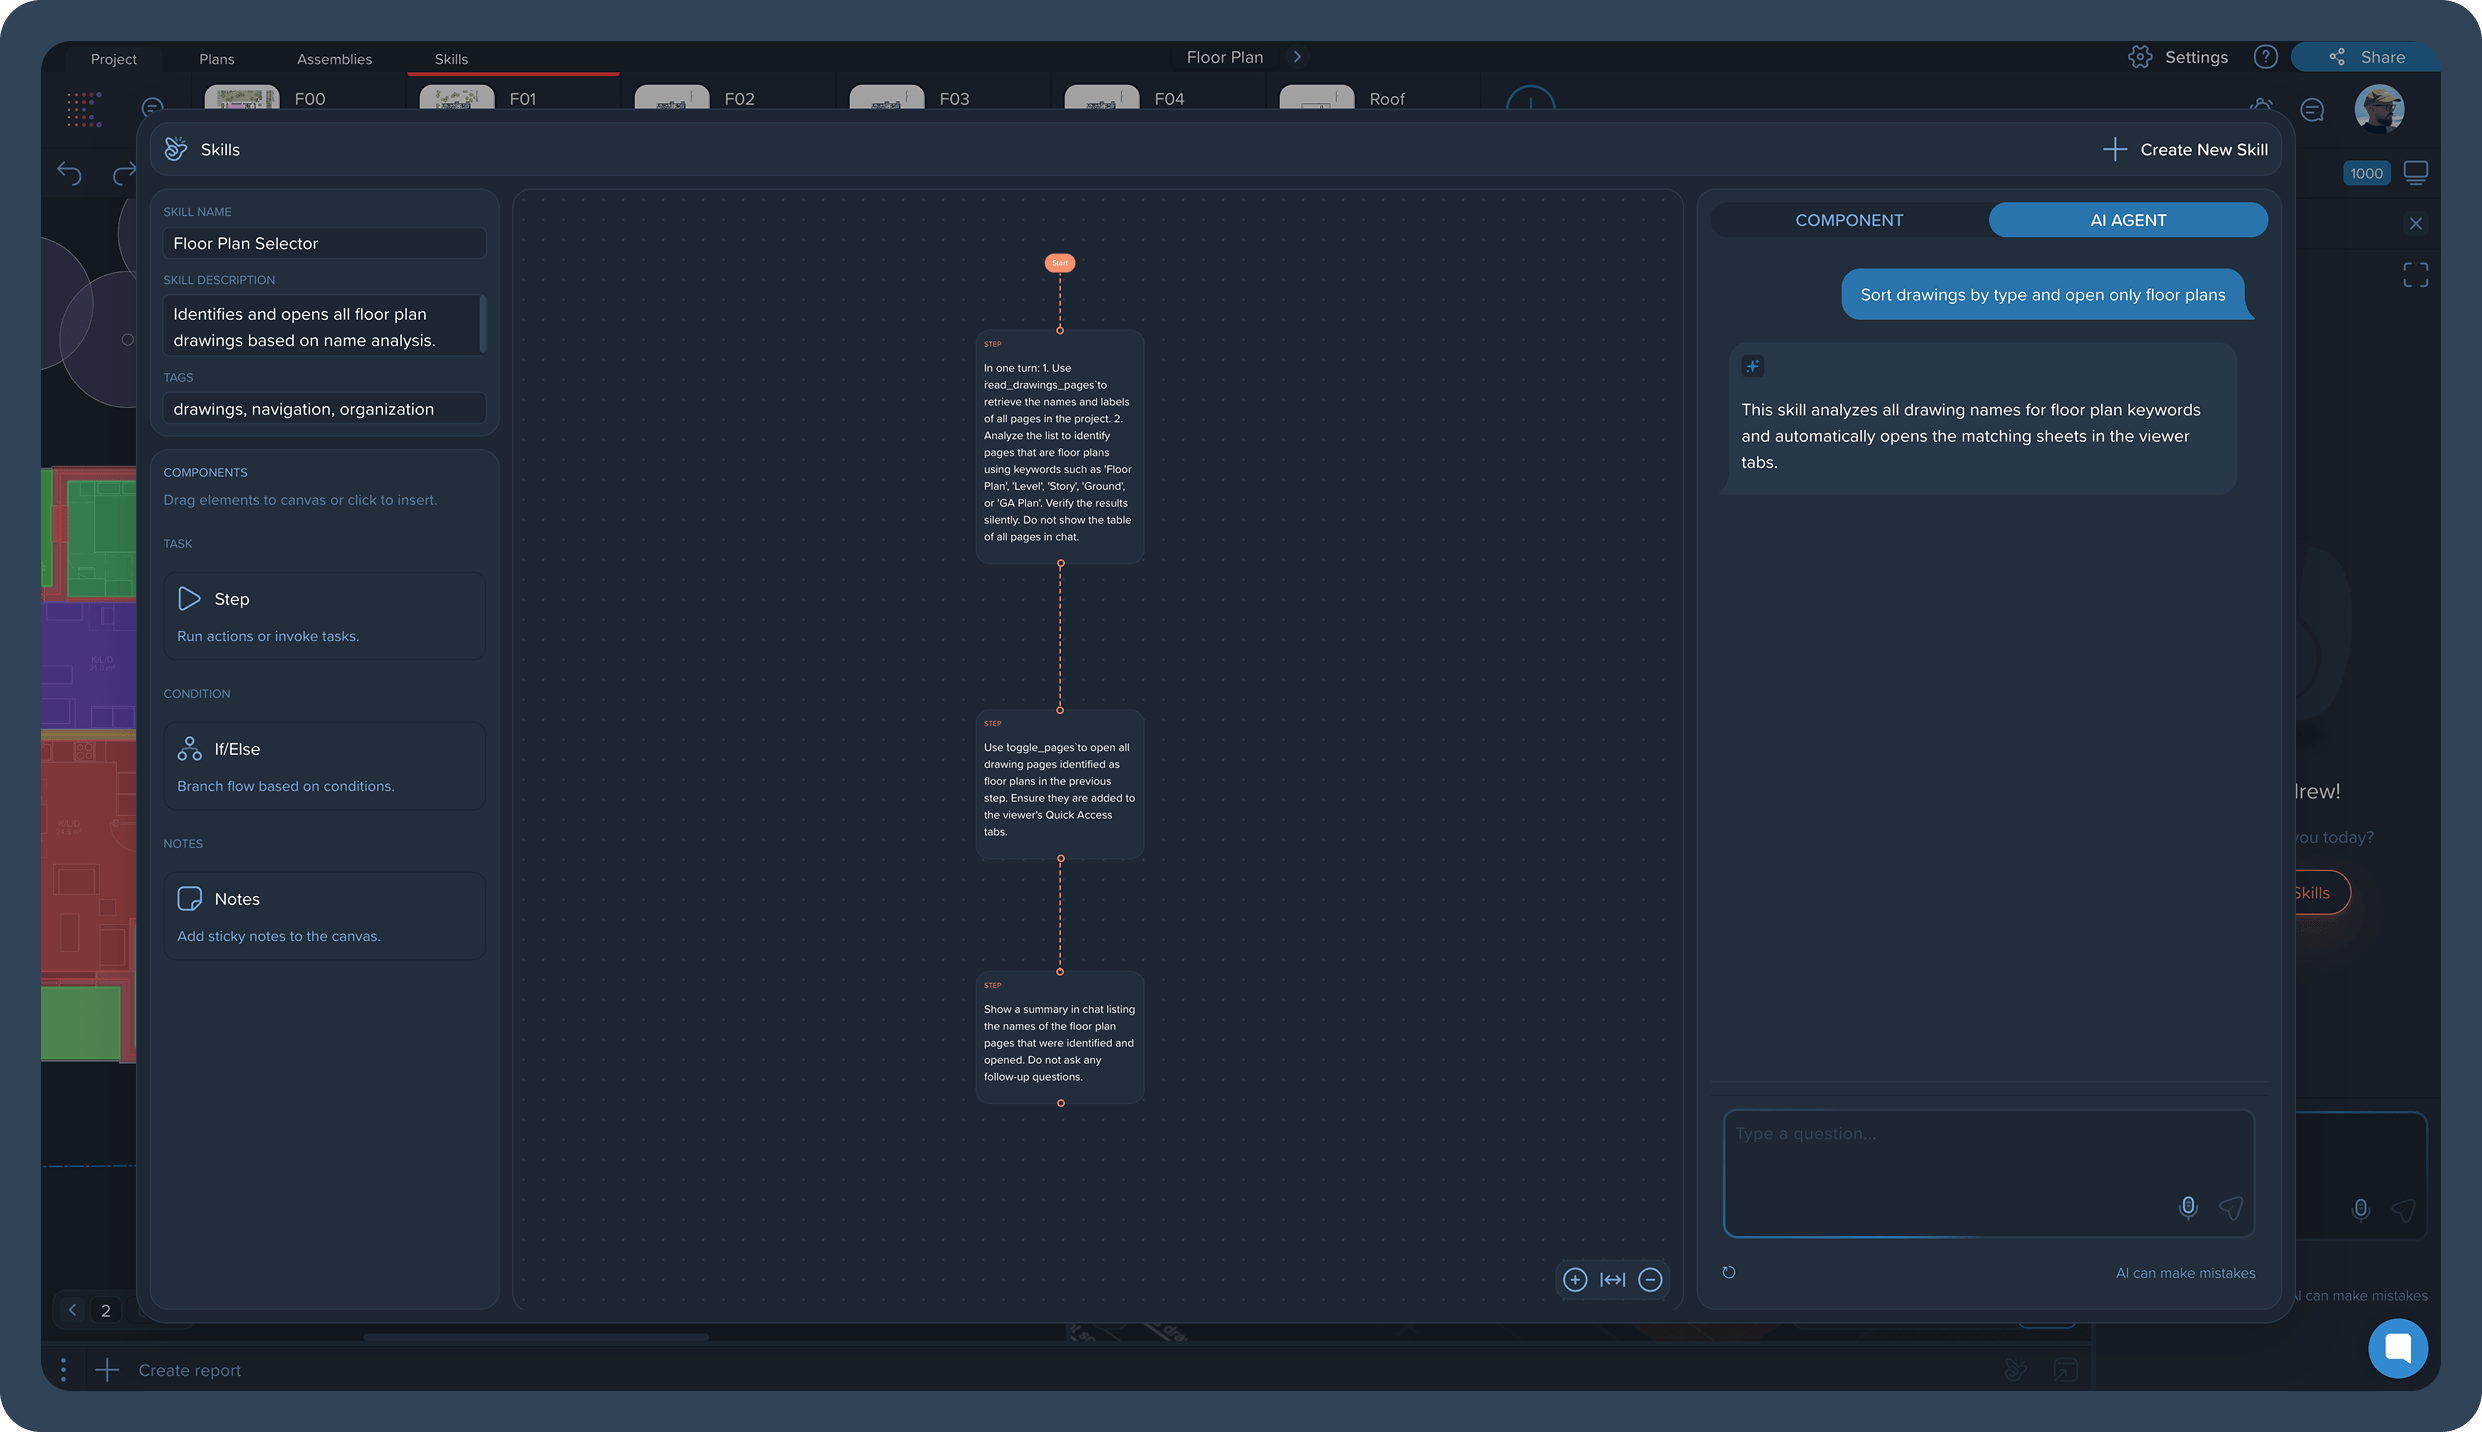
For what Skills are, how If/Else works, and how to tune them — see the previous post: Skills — AI workflows for repetitive processes. What’s new here is one thing: the on-ramp is shorter. Describe — get a scaffold — refine — reuse.
FAQ
Do I need to install anything for 3D? Which browser?
No separate desktop app for 3D View — it’s a mode inside the product in the browser. Use a current Chrome / Edge / Chromium-based browser, same as when you work with drawings in the product. If the scene is heavy, close extra tabs: 3D likes spare memory, but it’s still a web workflow, not “download a client.”
Do I need to place floors perfectly by hand?
No. Add the pages you need, then use Align Pages — Vertical to stack floors, Horizontal to compare them side by side. Set a floor height when you want levels to rise together; nudge height / offset only where the scene still looks wrong. Reset clears the current page if you overdid it. The goal isn’t a jewel-box scene. It’s a clear space you can leave quickly to get back to 2D.
Does Create skill with AI replace building skills by hand?
No — and that’s a good thing. AI speeds up the start: it turns a description into a draft. You check the steps, tighten the wording, add control points. A skill that feeds an estimate has to be predictable; predictability comes from your edits, not “generate and forget.” The manual builder is still there: for fine-tuning, it’s still the native tool.
Stability in this release
Besides 3D and AI-built skills, we tightened what you don’t want to notice — until it breaks: takeoff itself is more stable and faster, Caddie and the skills UI hold up better on long runs. No ticket list: if chat, skills, or heavy pages used to flake out, this release was meant to sand down that everyday roughness.
Try it on your own project
Open a project with several floors. Turn on 3D or 2D and 3D. Add Pages, set Align Pages (Vertical or Horizontal), nudge height where the scene lies, click a measurement in space, and land back in 2D on the right sheet.
If you also have a process you repeat by hand on every project — describe it and build your first skill with AI. And if you want to go deeper on how skills work and how they differ from “just chatting with an agent” — start with the Skills post.
Less holding the building in your head. More seeing the whole project — and jumping straight back to the exact drawing.
That’s it for now.
.png)

.png)


